 Motorcycle Parts and Accessories
For Japanese Brand
Bikes
- Accessory Items
- Apparel for Bikers
- Body Parts
- Brake Parts
- Controls
- Chassis
- Liquids
- Drive Parts
- Electrical
- Exhaust Parts
- Fuel System Parts
- Gaskets and Seals
- Motor Parts
- Shop Tools
- Windshields
- Gift Shop
- Ebay Store
- Tools and Tips
- SPECIAL AREAS
- Chopper Stuff
- Sport Bike Stuff
- Cruiser Stuff
- Deals

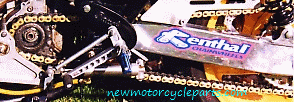
This area is a basic explanation of how you inspect and maintain a drive chain on a Japanese Motorcycle.
Chain
and Sprocket Tips
Chain care is one of the most important
maintenance tasks you can perform for your bike.
If you do not care for your chain and sprockets , YOU WILL NOT
MOVE.
You did not buy the bike to sit still, so let's talk chain care.
Inspect your chain for problems EVERY time you get ready to
ride.
If your chain breaks while you are moving it can not only be
embarrassing, it can cause catastrophic
damage to the bike or YOU! Any of the following can cause
failure;
A-
Broken rollers (these are the round parts that ride
against the teeth of the sprockets). Look for
rollers that look broken or are a different size than the
others.
B- Out-of-place link pins
(these are the rivets holding the links together) If any of the
pins look like
they have shifted into or out of the plates, they are
out-of-place. If one of these pins moves too far
the chain will fail.
C- Rusty links Rust can
be caused by many things; lack of lubrication, battery acid,
heat, and age.
Rusty links can hide cracks and should be treated as a problem.
D- kinks (this is where
the chain goes in a zigzag instead of a nice strait line from
the motor to the rear sprocket)
E- Broken or bent sprocket
teeth the teeth on the sprockets need to be perfectly
strait. If they are bent
the chain may not track true and could fail.
F- Loose chain the chain
should have no more, or less, than approximately 1 inch of
movement up or down
if you grab it half way between the two sprockets. (Don't forget
to adjust BOTH sides of the axel adjusters
so they are EVEN. The rear wheel MUST track strait)
Also, if you move the bike backwards and
the chain "pops" , you definitely have excessive chain and
sprocket wear.
This is true because a bike travels forward all the time so the
sprockets tend to wear in a directional pattern.
This will cause the chain to bunch when turned in the opposite
direction. You have probably heard the term "chain stretch".
This is the term used for the amount of wear of the holes that
the link pins run through. The wear makes the hole "egg shaped"
,
and this causes the chain to seem stretched. Look at it this
way, if every pin on your chain has 1/64th of an inch wear a 110
link chain is 1.72 inches longer than it was new. Most rear
sprockets average about 40 teeth and approximately half , of the
teeth, have the chain riding in them. Using the 1/64th wear
ratio that's .31 inches (just over 1/4th of an inch. This wear
does
not allow the chain to sit between the teeth of the sprocket
causing the chain to ride up each following tooth slightly more
than
the previous. This problem also makes the chain shift on the
sprocket anytime you down shift and then accelerate.
All of this also causes excessive sprocket wear and noise.
LUBRICATION
To properly lubricate your chain you must
first clean the old oil and grit off. Be careful to use a proper
solution to clean it.
Some chains can be damaged by petroleum cleaners (like o-ring
chains). If you do not clean the chain the dirt and sludge will
allow
the new lube to fly off and the grit to cause wear. They do make
some good kits for doing this. We sell a great solution for
cleaning
the chain called "Sludge Away" that will not harm o-ring chains
found in the Liquids section of the catalog. A small brush,
chain cleaner,
and a couple of shop rags will work too. If you have a non
o-ring chain you must not do too much cleaning or you will dry
out the internal
part of the chain. You have to dip the chain in hot liquid
grease (not a fun job) to fix this. That's the idea of an o-ring
chain. It keeps
the grease inside the chain where you can not easily get to.
If you do need to replace the
chain make sure you think about the following;
1-
O-ring or standard chain? (O-ring does not require as
much maintenance, but is more costly than the standard type
chain.)
2- Tensile Strength of
chain in comparison to the size and power of bike? (This is the
average maximum pounds the chain can handle all at once)
3- Replace sprockets too?
(to get maximum smoothness and mileage replace the sprockets.
4- Peen-on link or clip-on
link (If you do not have the very costly peen on link
tool, you need to ask if your new chain comes with a clip
on link. If it does not then you will want to buy one.)
Also, one of the main reasons chains
break at the master link is lack of lube on the pins of the link
when it is installed. So GREASE IT!
There are probably other issues on chains and sprockets we did
not cover. If you would like to see anything else listed, let us
know.
GO BACK TO INDEX