 Motorcycle Parts and Accessories
For Japanese Brand
Bikes
- Accessory Items
- Apparel for Bikers
- Body Parts
- Brake Parts
- Controls
- Chassis
- Liquids
- Drive Parts
- Electrical
- Exhaust Parts
- Fuel System Parts
- Gaskets and Seals
- Motor Parts
- Shop Tools
- Windshields
- Gift Shop
- Ebay Store
- Tools and Tips
- SPECIAL AREAS
- Chopper Stuff
- Sport Bike Stuff
- Cruiser Stuff
- Deals

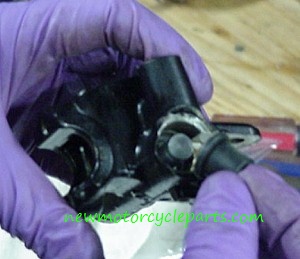
Installation of the piston and related parts.
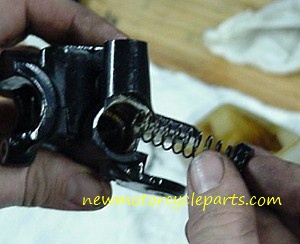
First install the spring and end seal in
the same direction the old one was removed. Be sure
to use a good amount of silicone spray lube on the parts prier
to installation.
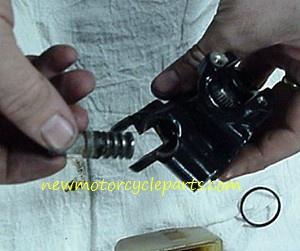
Next install the piston in the same
direction as the old one was removed. Again use plenty of
silicon lube on the parts. You will also have to keep your thumb
on the end of the piston and
keep it pushed in for the installation of the washer and snap
ring. This part can be a little tricky
so plan how you will do it before trying so you do not release
the piston and let it fly out or drop
the entire master cylinder and damage it.
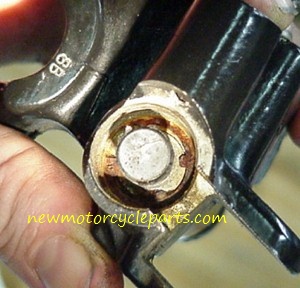
Now the picture shows the original snap
ring before removal, but we are using the picture to show
what the new snap ring placement will be after it is installed.
There is a groove the snap ring fits in
so you will want to make sure it is fully seated into the
groove.
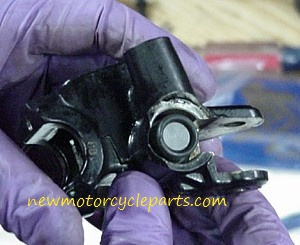
The last part of the installation is the
end dust seal. The dust seal typically just slips in and you
work
it into the inner groove inside the bore and there will be a
groove in the piston itself for the other end.
After installation it will look like the second picture and
should not be wrinkled. The use of silicone spray
for this step is not necessary. On some models there will be a
basic cir-clip (circle clip) that holds the
large end into the bore. If so install the cir-clip last and
take care not to puncture the dust seal.
Now that we are done with the inner
workings of the master cylinder, we will go over the basic
removal
and installation of the reservoir.
GO TO NEXT PAGE